It's joy to review Salter's AeroGrill, giving me oven-cooked flavours, after living without an oven for years. In fact, the lack of baked potatoes in my life has become a trendy topic lately. As the nation embraces cheaper alternatives to cooking, my partner and I are actually thinking of not buying an oven for our new home. When you consider the cost of running an oven in comparison to the alternatives, it seems to be an energy inefficient way for a two-person household to cook.
Lifestyle is a factor in deciding to be oven-less. We're busy people and don't have time to batch cook. After getting home late in the evening and we want a fast dinner. We're always looking for ways to lower our outgoings, including a monthly review of our household budget. Oh - and washing up is a domestic bugbear, so it needs to be easy, quick and painless. So, Salter's AeroGrill might just be the answer to our prayers.
This neat multifunctional countertop appliance has 16 cooking functions. It cooks faster, is healthier and runs at a much lower wattage than an oven. Believe me, we've done our homework - since we're new homeowners, we've been looking at the costs of buying, installing and getting rid of the existing broken oven. It's simply too much money for us right now, and if the AeroGrill can give me back baked potatoes (not the microwave kind) then I'm more than happy to forego a conventional oven and use the freed-up space to make another cupboard.
Follow A Modern Kitchen on Pinterest and Instagram for more inspirational moments
Salter Aerogrill: Summary
A Modern Kitchen tested out Salter's Professional AeroGrill Pro, 16 in 1 Tabletop Multicooker & Health Grill to find out how this appliance performs across the functions it offers: grilling, air frying, baking and roasting and more. Salter claims that this appliance claims can save you 68 per cent on your energy bill for cooking*.
*Comparing the energy used (kWh) per kg of chicken using a 1.8 kW oven.
On Sale
Key features: 16 cooking functions on the control panel, they are grill, manual, dumplings, chips, beef, pork, chicken, drumsticks, wings, fish, shellfish, sausage, BBQ skewers, pizza, bake and dehydrate. The appliance reaches a maximum temperature of 230 degrees. The touch control display means you can precisely adjust the time and temperature. On Salter's website, the product description states this is a chargrill-infused multicooker.
Pros
- It cooks meat, grills chips, bakes buns and dehydrates perfectly
- Cooks food from frozen
- Easy to clean
- Less intense cooking smells and no fumes
Cons
- It has to preheat - so think about what's really worth cooking in it. For example, if you're heating up some flatbreads, it's quicker to use a toaster.
- It's as loud as a standard microwave, which is not ideal if you're running the appliance for 6-8 hours on the dehydrating setting.
- Power cable is short
- Menu selection is slightly confusing
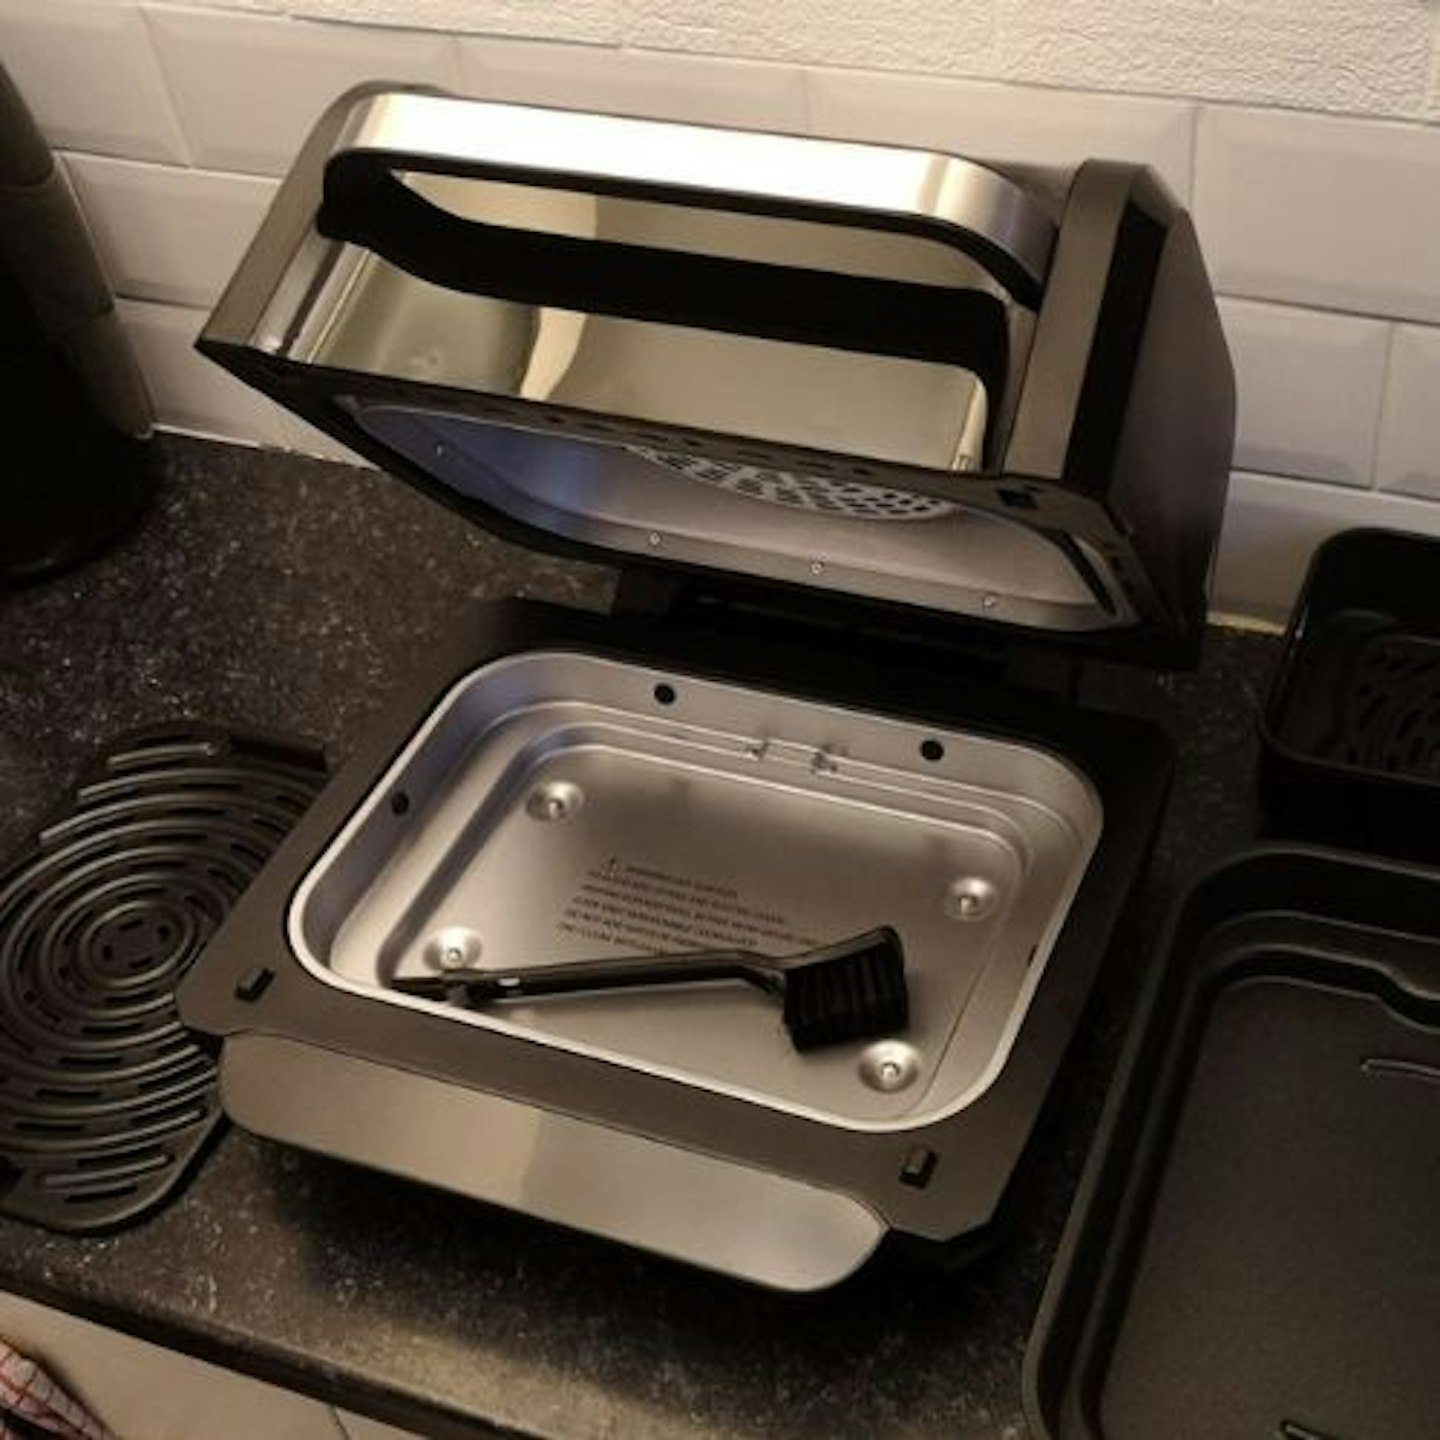
Cleaning: To quote my partner and put it on record that he did the washing up: "It's the easiest thing I've ever cleaned in my life." I totally agree. The grill tray and cooking pot cool quickly and can be washed with no soaking required. The handy washing-up brush that's provided is the perfect size for cleaning the grill. The end tip brush is useful for getting into the holes and grooves on the grill plate.
Price: With an RRP of £149.99, the Professional AeroGrill Pro is at the midpoint of the price range for health grills in comparison to the Ninja Foodi MAX Health Grill and Air Fryer (£249.99) and Haden Multi Pro Health Grill and Air Fryer (£124.99). Salter's AeroGrill has the unique selling point of offering 16 cooking functions, which is double the competition.
Rating: 4/5
Testing the Salter AeroGrill
What was the product tested for?
I tested the AeroGrill over the course of a month in a two-person household. We're health conscious and don't have an oven (as we've just moved into our new home), so it's a real treat to have roasted anything. We love to experiment, and I was eager to try some of the AeroGrill's more intriguing functions, such as dehydrating. I'm vegetarian, and my partner is flexi, so we tried out some recipes that would suit both of us. The AeroGrill food tests that follow include baking, a meaty mixed grill, chips, chops and dehydrated clementines.
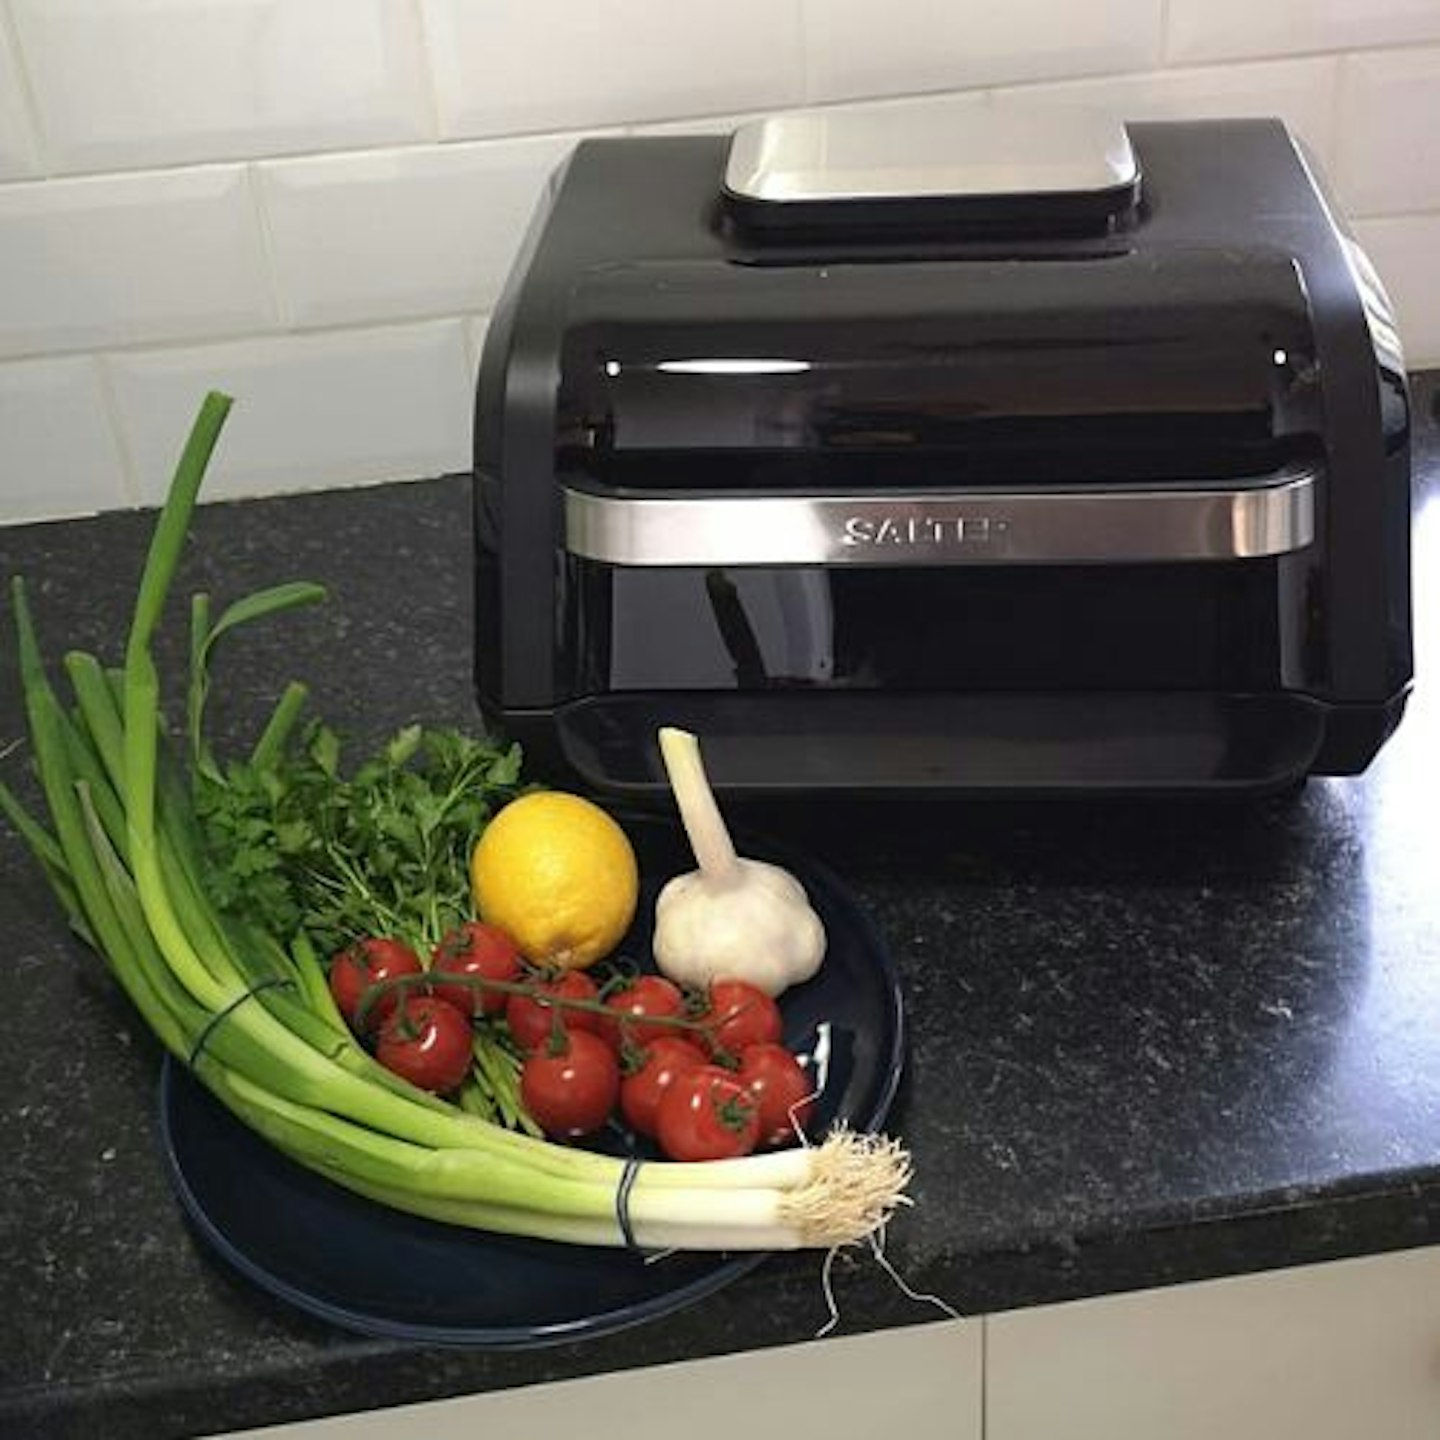
On initial appearances, the AeroGrill is bigger than expected, and it fills the depth of the countertop. I would have liked the power cable to be a bit longer; we had to use an extension cable so that we could plug it in at the wall. Of course, this won't be the same for every kitchen, but we have a merry assortment of appliances. While our air fryer and slow cooker happily fit next to the wall under a kitchen cupboard, the AeroGrill is too wide and deep to fit there.
When you open up the appliance and look at the cooking capacity, there's enough to cook for two but definitely no more. The cooking element is contained in the lid, which is why the AeroGrill is rather top-heavy. That said, I like having the hinged lid rather than it being separate, like you find with the majority of halogen ovens. It's well made; the lid stays in place, so it's safe when you're taking hot food out. The outer casing of the AeroGrill stays relatively cool and it's safe to touch it. For a rough comparison, our air fryer feels hotter than the AeroGrill when cooking.
Performance
What were the results?
Before we get to all the wonderful food that we cooked in the AeroGrill, a word about reading the instructions first. I am the world's worst person for being in a hurry. I wrongly assumed that using the AeroGrill would be the same as using an air fryer in that it would get hot relatively instantly. No. The AeroGrill is more like an oven in that it needs to preheat first. I know this because, after a very confusing attempt to roast Mediterranean vegetables, I realised that I needed to take five minutes to read the instruction booklet. I wish I'd read the instructions first... and saved my partner saying, "I told you so".
After taking five minutes to read the instruction booklet, rather than barrelling in thinking the AeroGrill would be as instant as an air fryer. I took time to understand how to select the pre-set cooking functions. I thought that I should press the icon I wanted but it doesn't work like that. You need to select by pressing the menu button and then using the arrows to scroll to the cooking function you want - in this case it was baking (for which I used the croissant icon).

The arrows are up and down, which is odd because the pre-set icons are in rows.
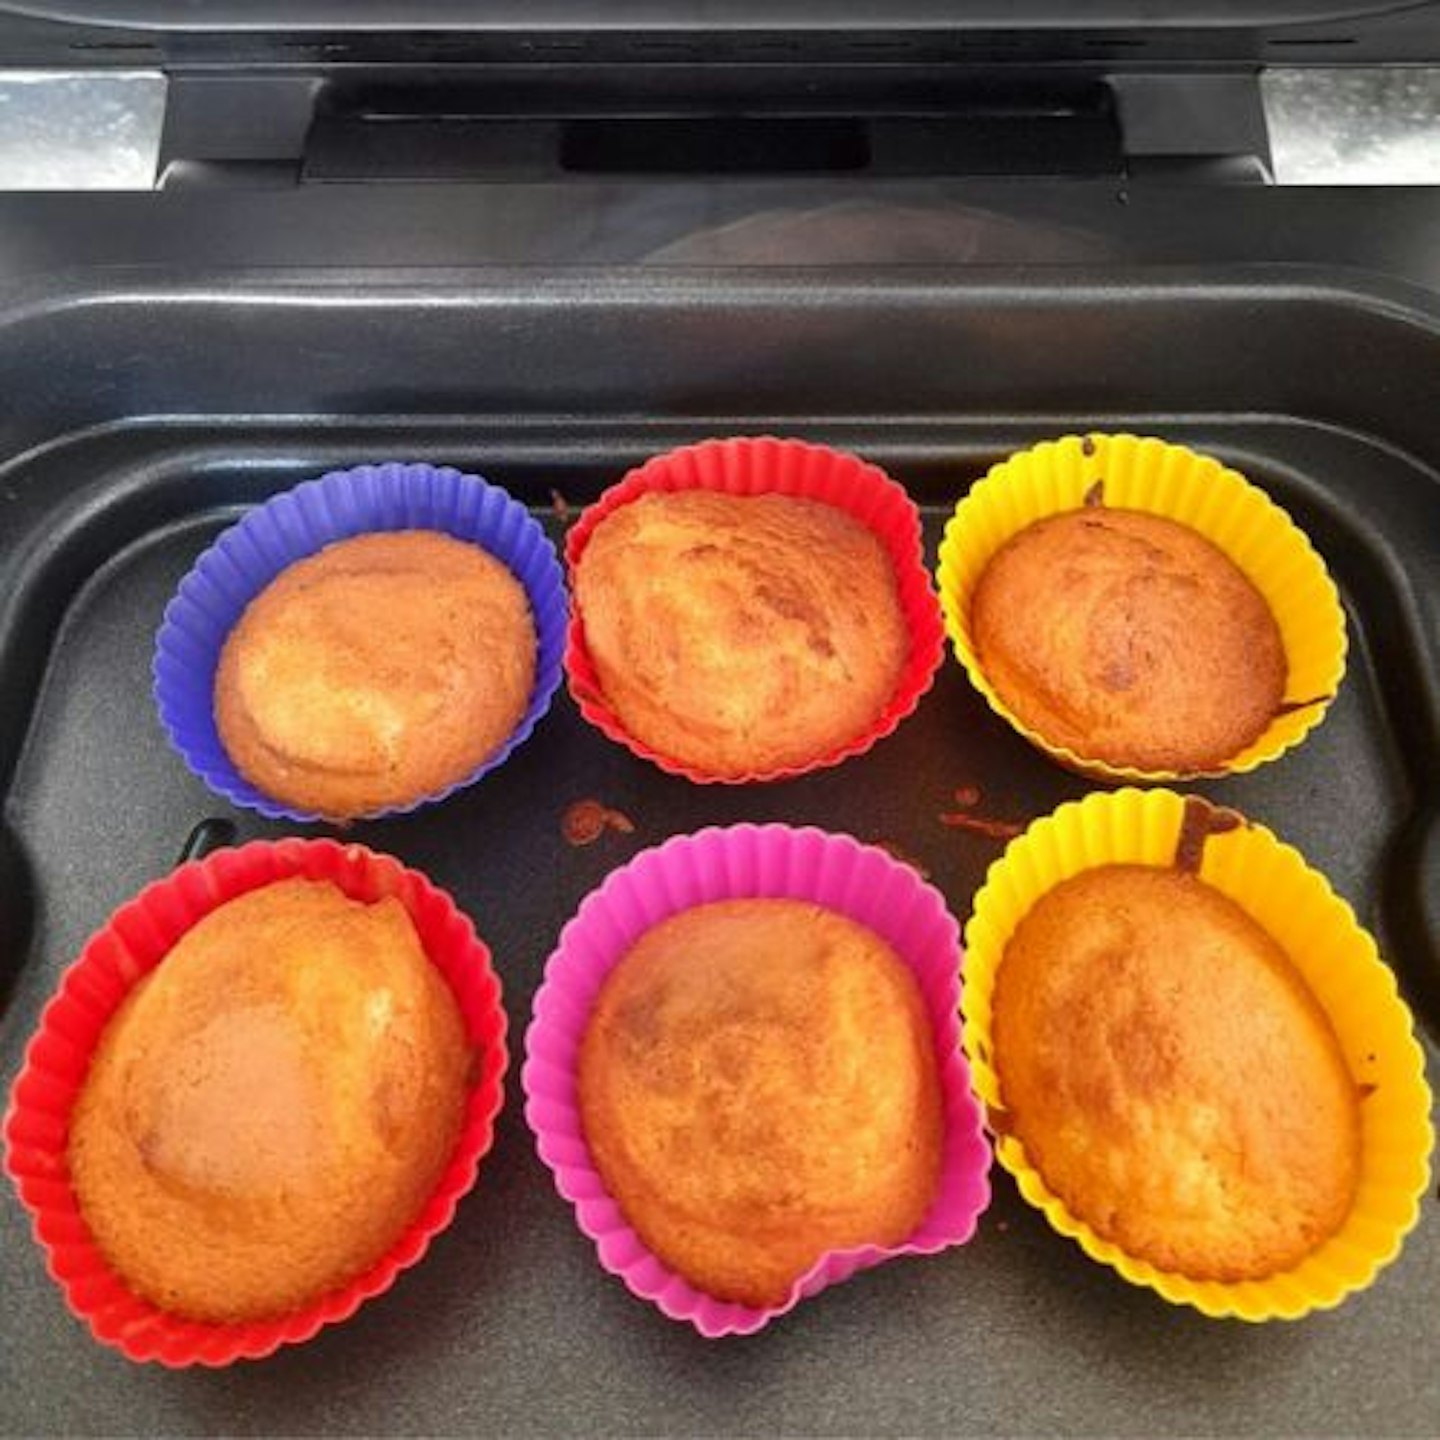
The next part is my own fault, whilst the AeroGrill was preheating, I should have pre-ladled my cake batter into my silicone cases. I let all the heat out of the appliance as I took time to ladle my batter into the cases. I hoped this wouldn't ruin the result of the bake. By putting the lid down, the AeroGrill automatically switched to cooking mode for 15 minutes at 160 degrees. One other point is that I left the grill plate in, and my cupcake cases wouldn't fit. By using a tea towel, I removed the very hot grill plate. I was quickly learning that this appliance is much more like using an oven than an air fryer.
I had spilt some cake batter on the 'cooking pot'. But it's so easy to clean the non-stick surface. After a taste test, my partner and I agreed that the cupcakes were perfectly cooked... and the best thing I've ever baked.
Cooking meat in the Salter AeroGrill
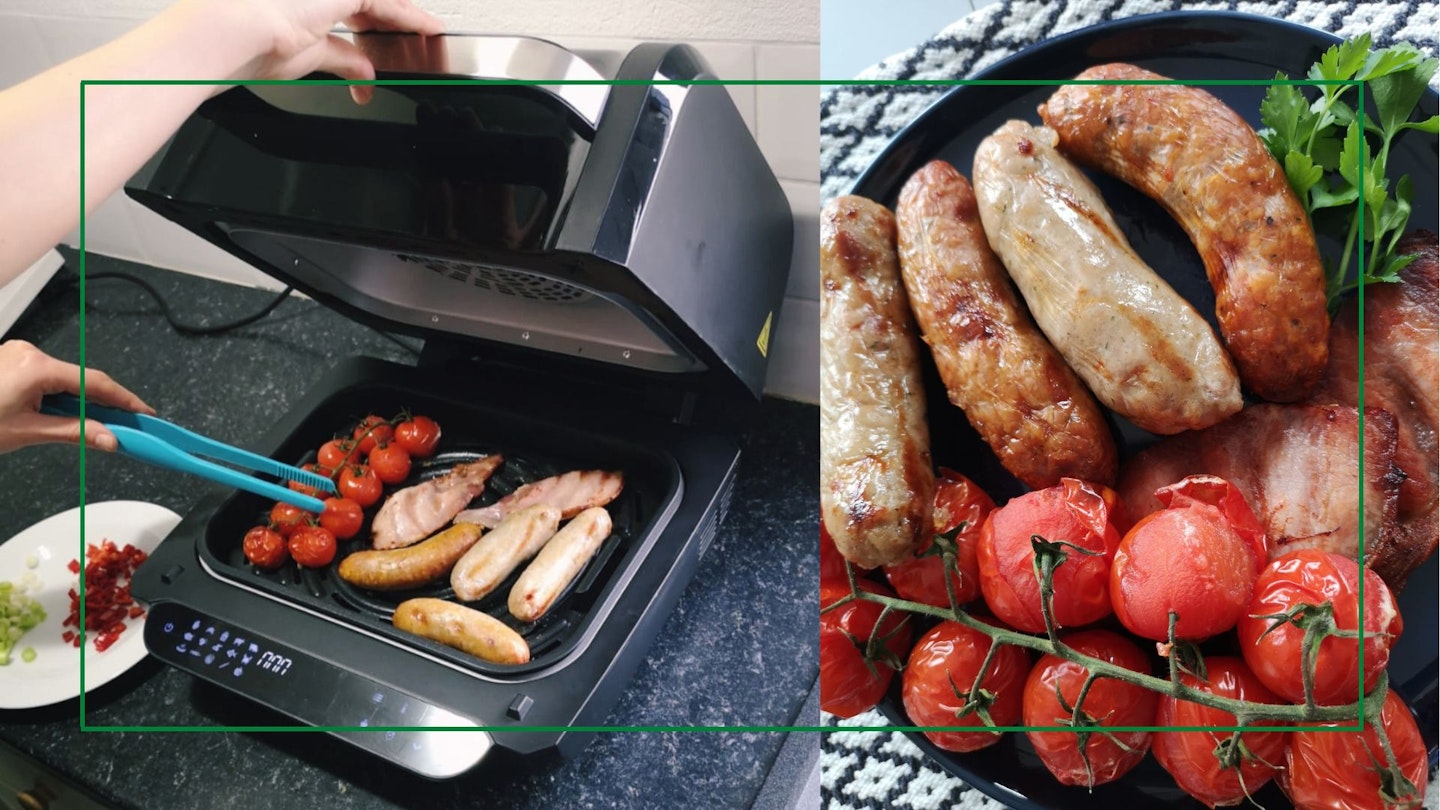
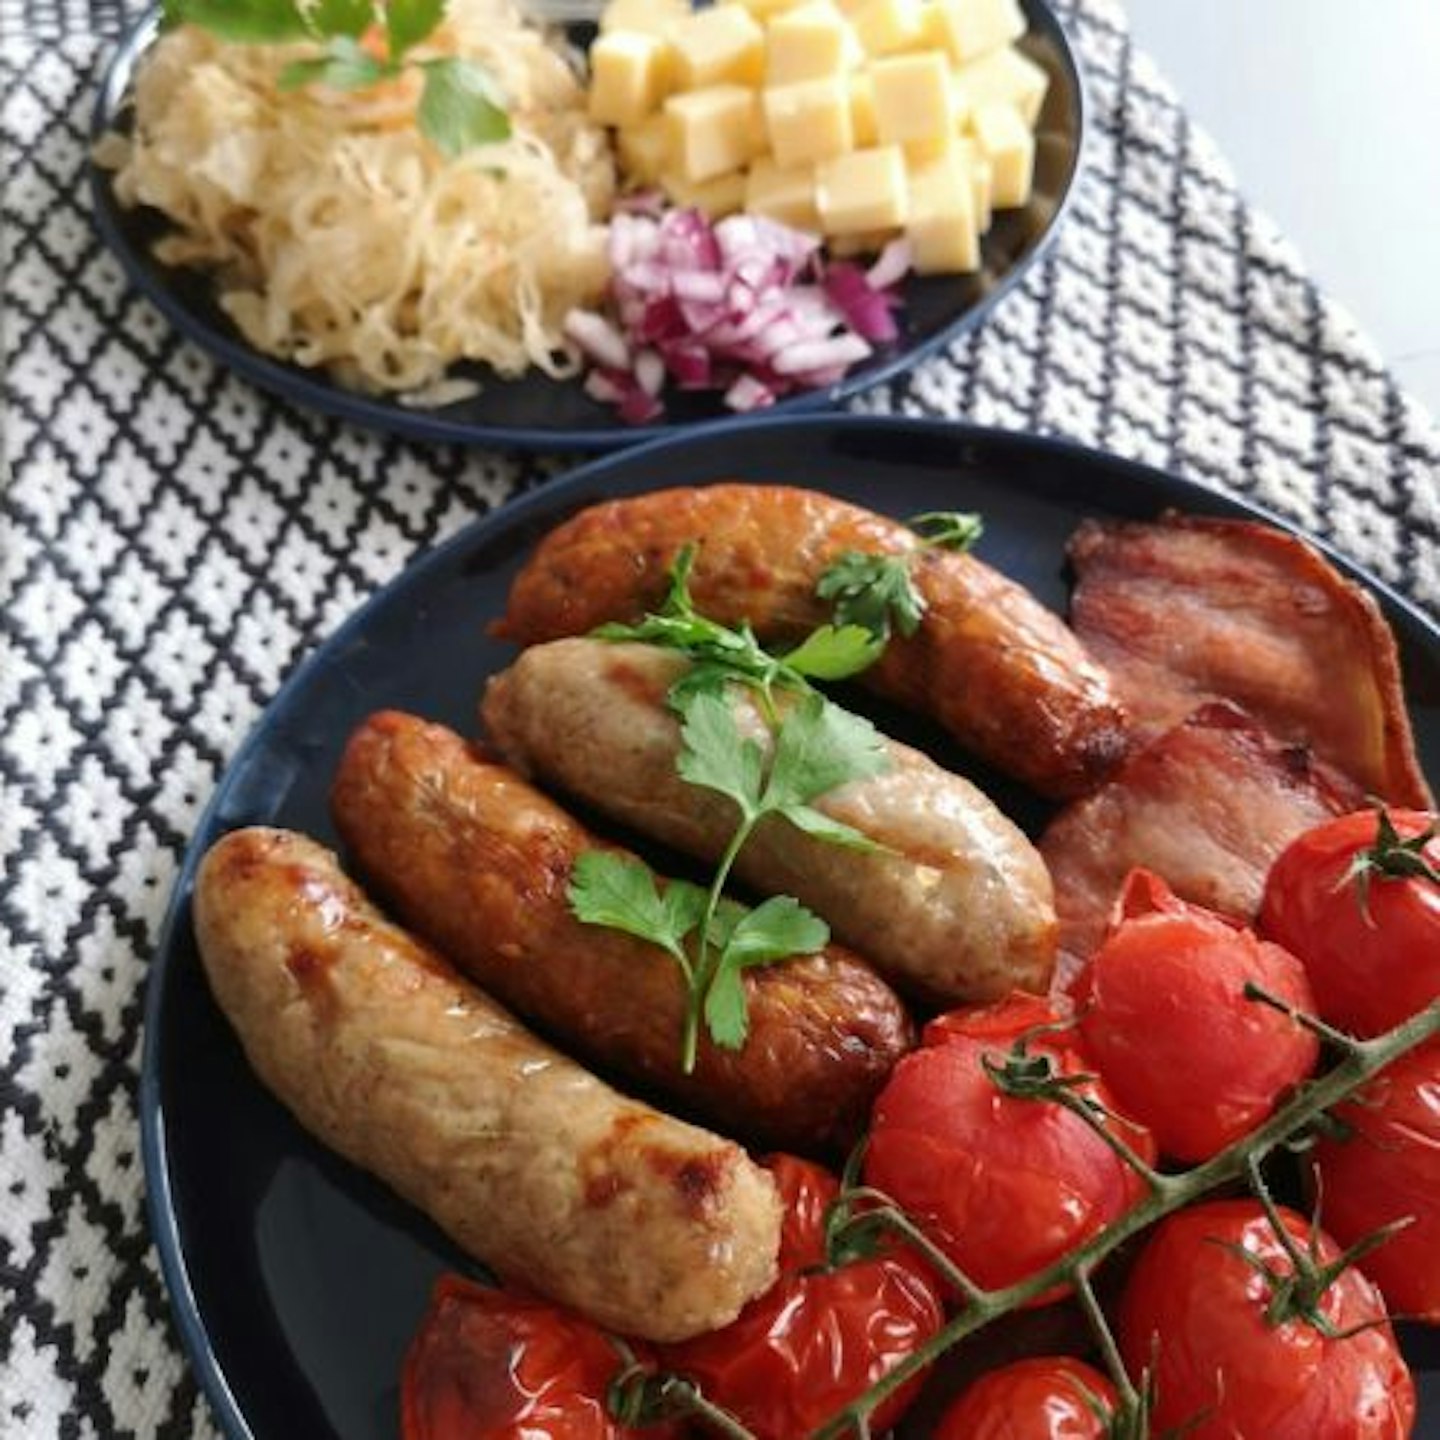
Next, I decided to try grill some meats as I felt this is where the AeroGrill could show its benefits. Firstly, I used the sausage pre-set to cook a mixed grill. Once again, the AeroGrill defaulted to pre-heat for five minutes. It beeped to indicate that food should be added. There was a very pleasant sizzle as we put sausages, bacon and vine tomatoes on the grill tray. I do wish the capacity of the grill was bigger as I couldn't fit my portobello mushroom in. This gave my partner the opportunity to feel smug all day with his wonderful pun: "There ain't mush-room in there". Once the lid was closed, the AeroGrill cooked at 170 degrees for 15 minutes.
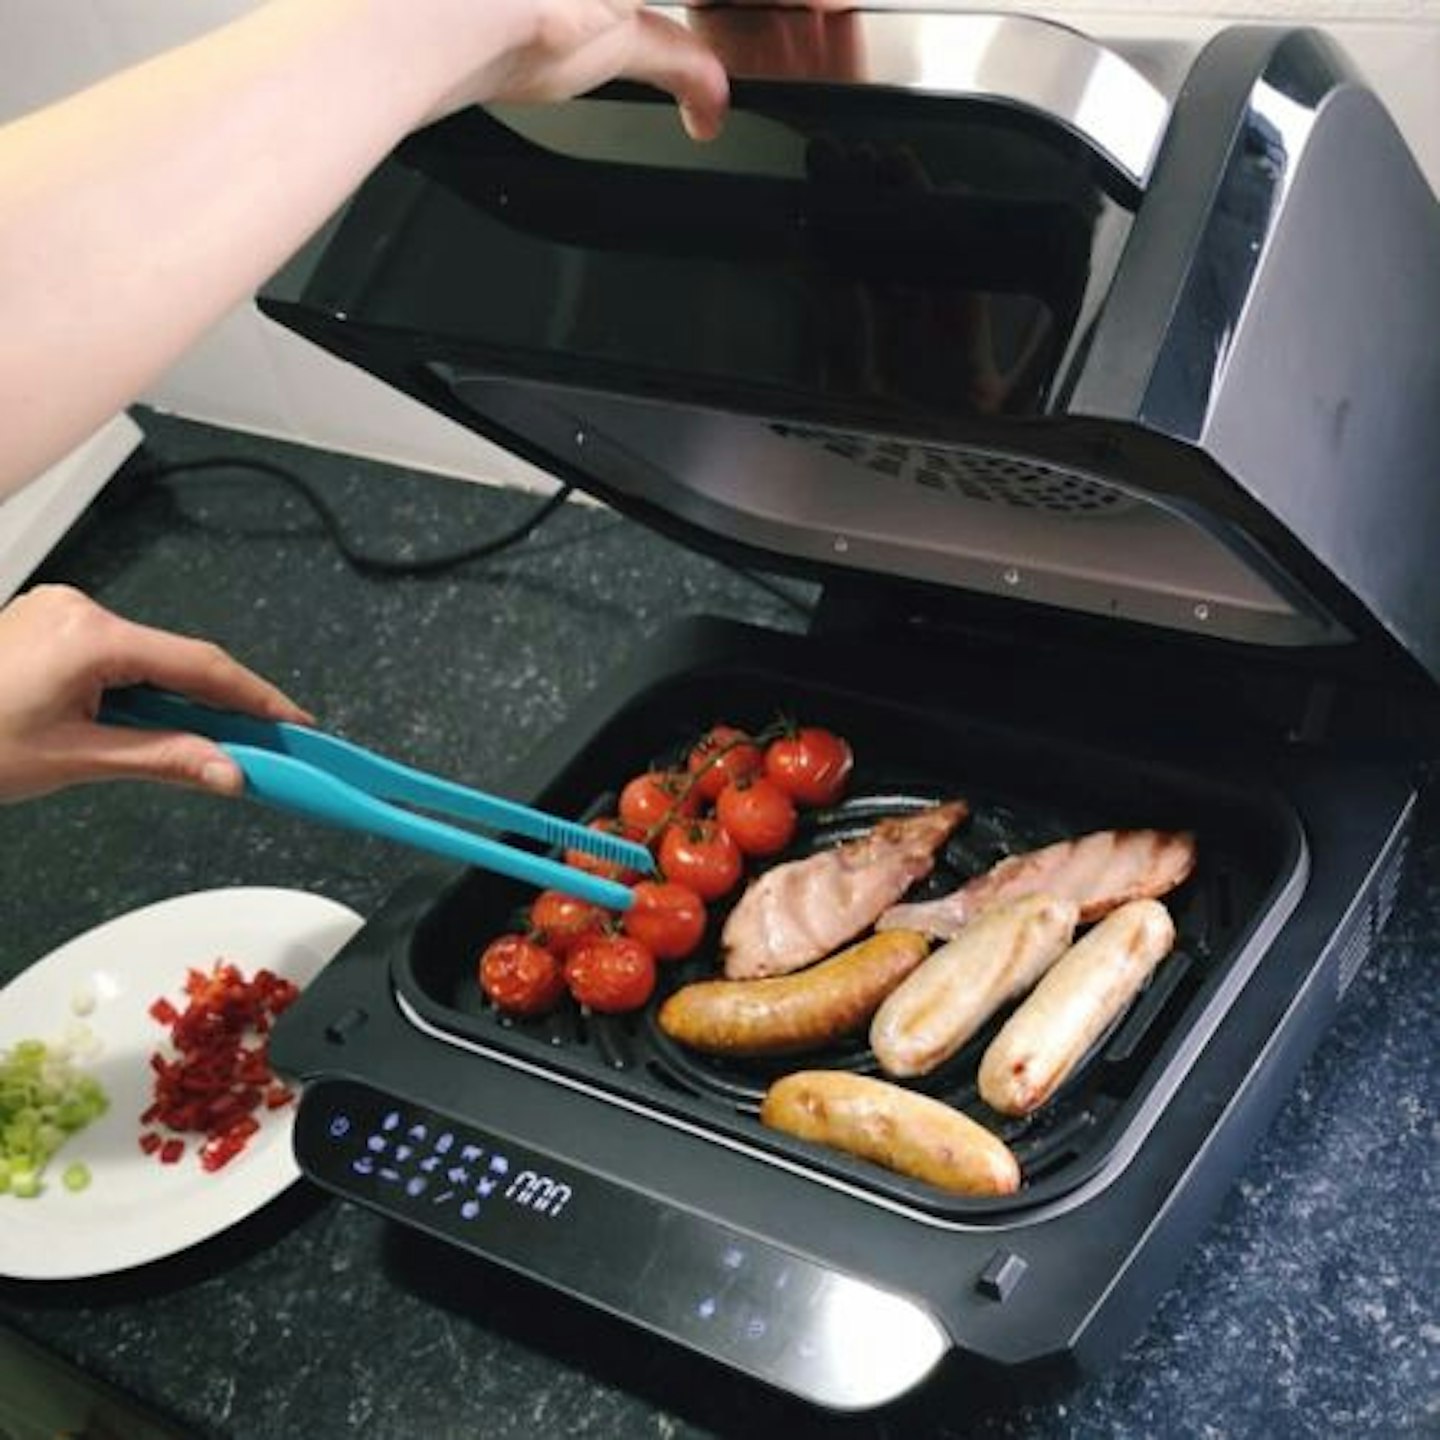
After seven minutes, we could smell sausages. We checked the mixed grill, with four minutes to go - thinking we'd need to flip the sausages and bacon - but everything was cooking beautifully and evenly. At 15 minutes, we opened the AeroGrill and removed the perfectly cooked contents. The smell was pleasant and not overpowering. There wasn't any mess or smoke that you get with conventional frying.
I should explain, at this point, that there is the option to manually set the time, temperature and cook on low, medium or high. A steak icon denotes how well done you want your food to be cooked. We've used this method of cooking for weeknight meals, such as cooking vegetable burgers and our favourite jerk marinated tofu. It's ideal if you have waffles, fish fingers, or pizza that you want to cook quickly. And yes, the AeroGrill does cook from frozen.
Next, we tried cooking on the chicken pre-set. In my experience, I find oven-cooked chicken can be dry unless it has butter or oil added. As a vegetarian, it's also difficult to judge if I've got it right when I'm cooking meat for others. Cooking on the chicken pre-set, defaults to five minutes of preheating and then cooks at 200 degrees for 20 minutes. We could smell it cooking at 10 minutes in.

The chicken was perfectly cooked through and retained a juiciness that is difficult to achieve without the addition of fat. But be careful of putting other things in to cook with it. We'd cut lemons in half, and because they're chunky, they were a wonderful accompaniment to the chicken. I squeezed one to taste it and thought it was wonderfully caramelised. However, the garlic and small chunks of red onion and yellow peppers were burnt. It's totally understandable, as they were cooking on the chicken pre-set. Also, because they were on the grill tray, they were close to the heat source. Similarly, when we made our mixed grill on the sausages pre-set, we'd added bacon and a vine of cherry tomatoes. My partner said the sausages were perfect, but the bacon was overcooked. However, I ate the tomatoes and thought they were wonderful.
Dehydrating in the Salter AeroGrill
The dehydration function intrigued me from the start, and I was eager to try it. With a Saturday set aside to generally 'nest' in our new home, I thought it was a great opportunity to make some Christmas decorations.
I'd decided to dry out some clementines that we'd neglected in the back of the fridge. But I found that there was no guidance in the recipe booklet for small citrus fruits. So, I was initially going to manually set the AeroGrill to what I thought was the nearest similar fruit: pineapple. According to the booklet, pineapple should dry out at 60 degrees for 6-8 hours. As dehydrating is an entirely new concept to me, I wished there was a recipe in the instruction booklet. I cut my four clementines into 3mm slices. Then, when I looked at the pre-sets, I discovered it was actually much simpler just to select the pre-set icon for dehydrating (an apple with waves running through it), which defaulted to eight hours at 50 degrees.
It's noisy running the AeroGrill for a lengthy amount of time. It's very much like having a microwave or washing machine on for eight hours. Such conspicuous noise is not ideal in a flat. Also, I wasn't sure if I could utilise the grill tray to make two layers, so I just used the cooking pot and had one layer of clementines. If I'm choosing to run an appliance for eight hours, ideally, I want the capacity to do a big batch. I would welcome more guidance on this from Salter.

Having noted my criticisms, the end result was so worth it. Straight out of the AeroGrill, the slices were slightly sticky but well dried out and cool to the touch. They'll make wonderful Christmas garlands, and I'd like to put a few on a festive wreath too.
Usability
I quickly found that the AeroGrill became an integral part of our meals. I just loved how easy it was to clean, it didn't emit as much smell as the hob or slow cooker. Also, it was super easy to put food in and get food out safely. The AeroGrill works best alongside other appliances rather than cooking an entire meal it in, and we found that it was ideal for the main proteins, chunky vegetables or potatoes in our dinner, alongside something substantial from our slow cooker and a side dish from our air fryer.
As noted earlier, this appliance was bigger than expected. It came in a huge box that I couldn't get my arms around and could only just lift. The appliances and accessories inside the box were well-packaged and protected. Within ten minutes, I had the AeroGrill set up on my kitchen counter. Over the course of testing, we found it was easy to move around the kitchen when we were preparing dinner together and needed extra space to chop vegetables.
It's also a good appliance for anyone with mobility issues. The handle is ergonomic, and the lid is a doddle to lift. No bending down or reaching up, the AeroGrill sits on your work surface. The digital display and pre-sets may take a little time to understand, but once you know, it's simple. However, for some people, the icons might be too small to read.
The biggest plus point is how easy the AeroGrill is to clean. Use a little soapy water and the brush provided - and hey presto - the non-stick cooking pot, crisper basket and grill tray are like new. All the accessories are lightweight too. Even better news for those of you who have dishwashers is that the cooking trays are dishwasher safe.
A handy recipe and cooking guide is provided along with the instruction booklet. It covers foods for grilling, air frying, cooking from frozen and dehydration. The guide relates more to cooking using the low, medium and high settings where you can set the time and temperature. A BBQ icon denotes this method of cooking. Above this, is a menu icon (three lines) - use this if you want to cook using the pre-set functions. Navigate the icons by using the up and down arrows.
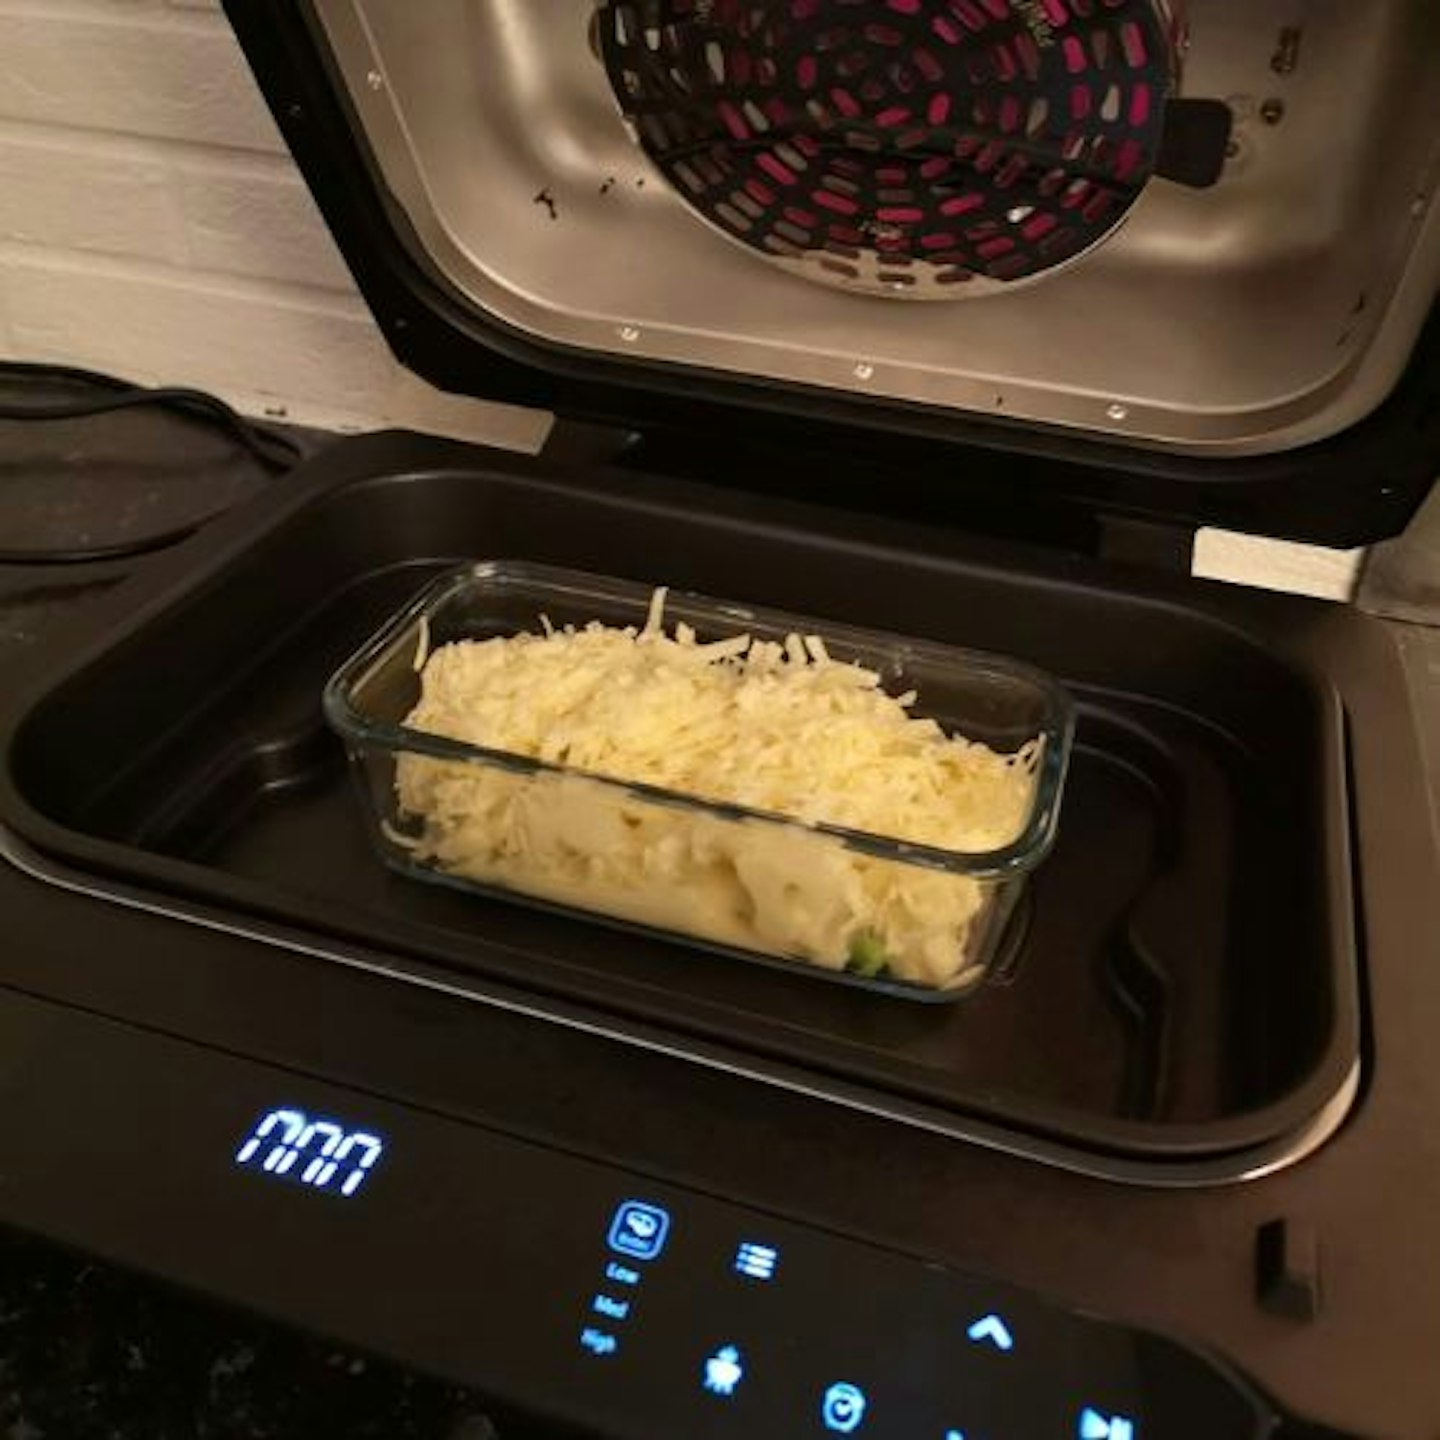
For extra versatility, it's good to know that it's safe to use Pyrex cookware and silicone bakeware in the Aerogrill. For cauliflower cheese, I set the AeroGrill to medium, 170 degrees and heated my dish for 10 minutes. I wanted to see if the cheese would bake on top.
After five minutes preheating, it was interesting to note that the heating element was glowing red. I only cooked the dish for 10 minutes, and it was wonderfully bubbling, melted and gaining a baked colouration. With the precise and flexible time and temperature settings, you can cook your food exactly how you like it. In addition, the hinged lid makes it super easy to check on your food.
How the AeroGrill handles fatty food
I wanted to test cooking a fatty meat to see if it would be particularly smelly or messy, in comparison to the majority of things I'd cooked so far. I used the crisper basket inside the cooking pot to roast the lamb chops, so that the fat would drain through the holes into the cooking pot below - making this a healthier way of cooking. There's no lamb pre-set, so I chose the closest option, which was a pig icon for pork. After five minutes preheating, the AeroGrill cooked the meat at 195 degrees for 15 minutes. The lamb chops sizzled as I placed them in the crisper basket, along with a couple of slices of red onion for flavour.
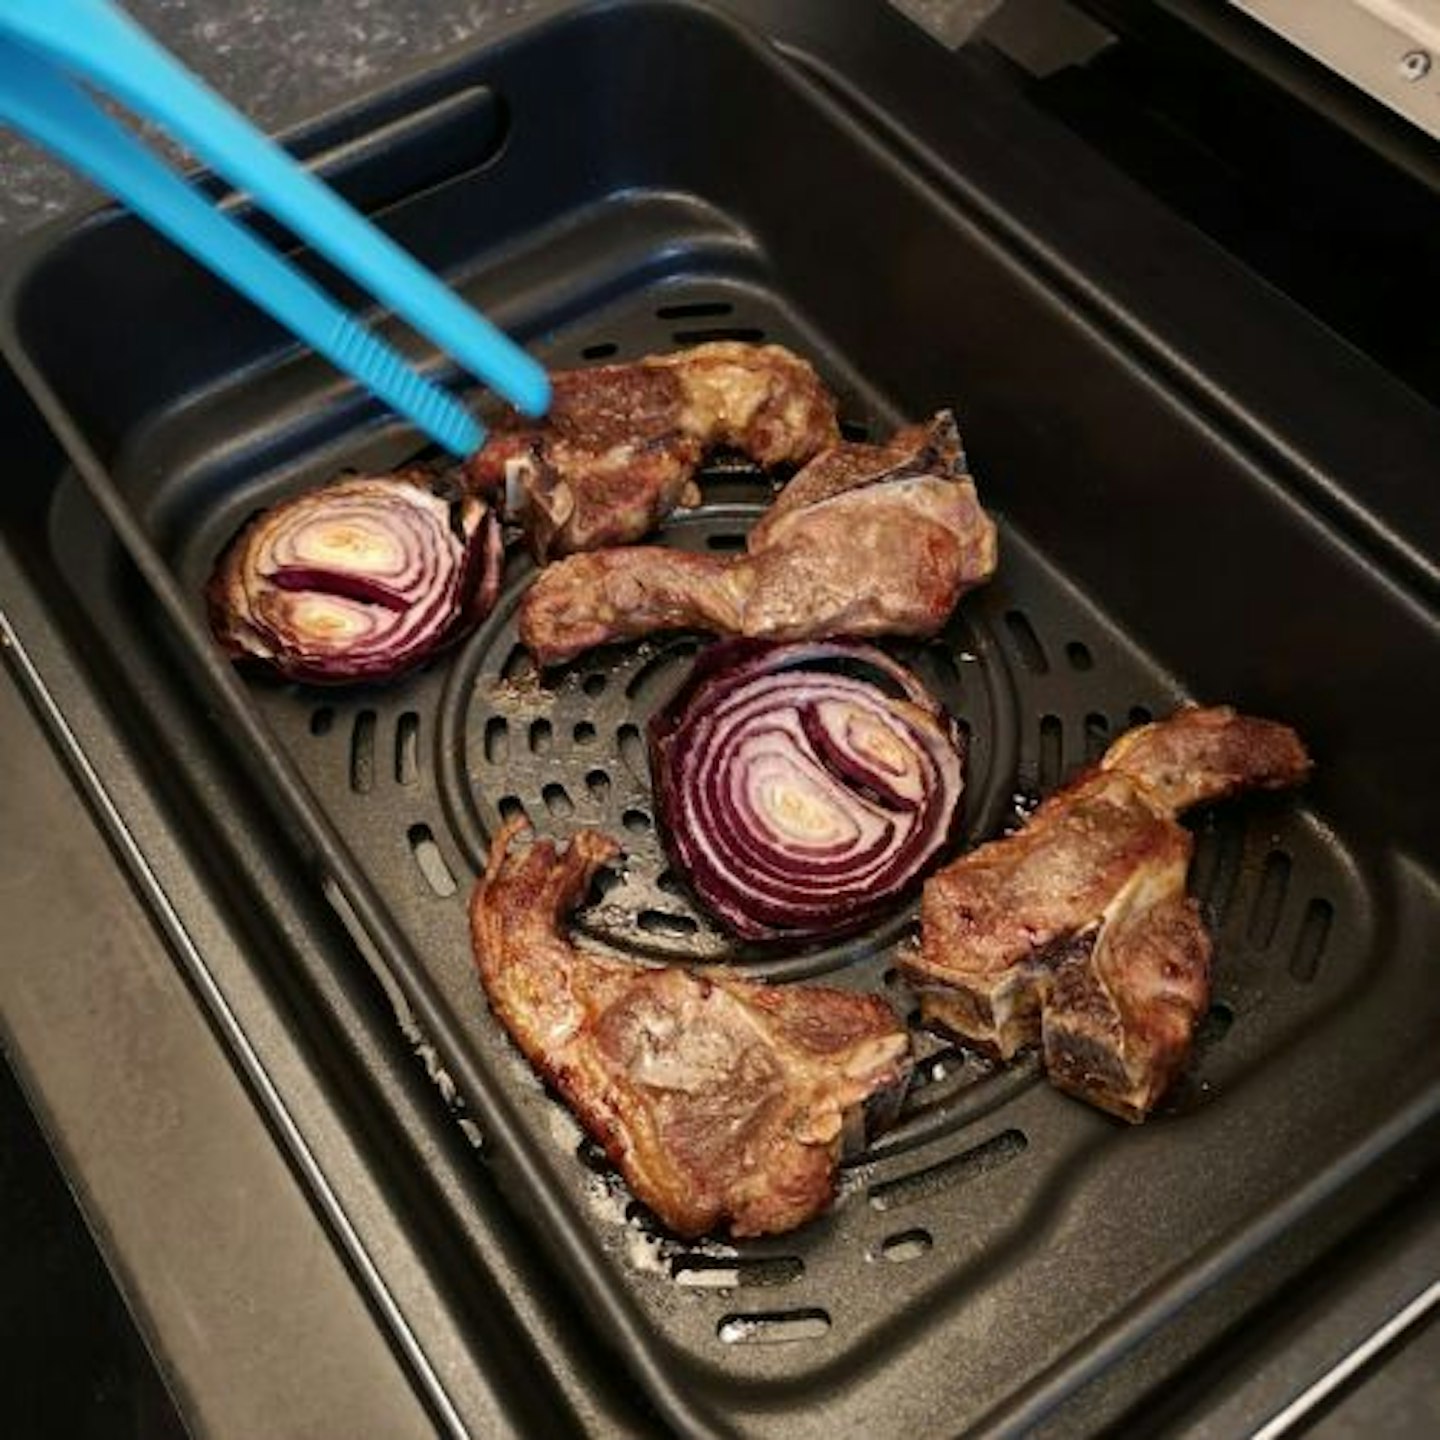
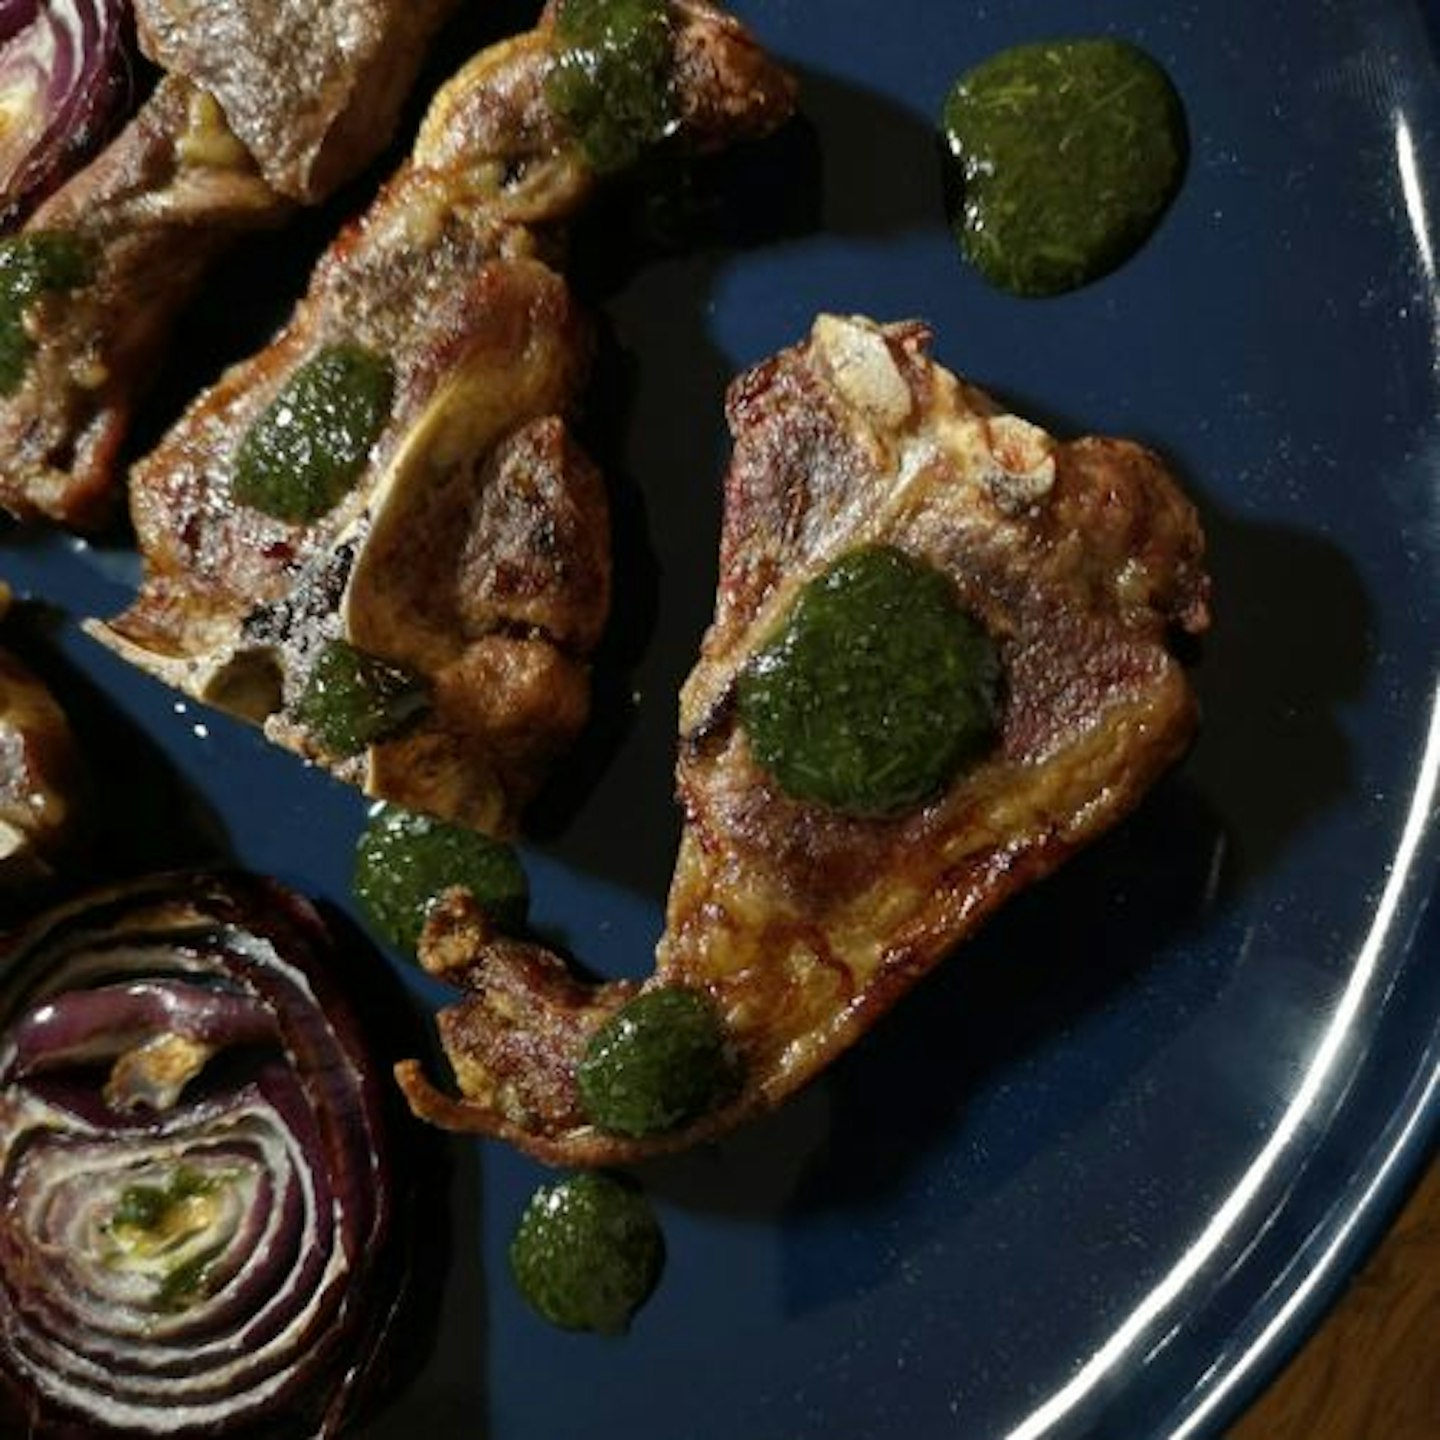
After three minutes, I could hear the chops sizzling, and I could smell them. My partner requested well-done chops. After 15 minutes, the chops looked perfect and tasted good. There were no fumes, as you'd expect with frying and open grilling.
The grease dripped into the cooking pot below, and the crisper basket and the cooking pot were easy to wash with a brush in hot soapy water - coming out perfectly clean.
Finally, as is so typical of our household, I tested cooking a variety of foods at once. Our Friday night dinners are a little bit like British Tapas, where we have lots of little tasty dishes to pick at. Earlier in the day, I had cooked our Halloween munchkins in the AeroGrill to get the flesh out of the skins. I cooked them on low 150 degrees for 20 minutes. Once again, perfect results. I actually ended up reheating them for dinner, along with some vegetable burgers and potato croquettes. The AeroGrill is so good for cooking convenience food from frozen and reheating. All three items were crisp, fully cooked through and in no way burnt.

Build
The Salter AeroGrill Pro tabletop multicooker is 25.6cm tall, 41.4cm wide, and a chunky 40.6cm deep. Please bear this in mind and measure your worktop first to ensure it will fit. Do not install this appliance under cupboards or in recesses, as it needs air to circulate around it. You also need to be able to lift the lid.
The removable grill tray measures 33cm wide by 22.5cm deep and 5cm high. This is a good capacity for a one- or two-person household.
How does the Salter AeroGrill compare to other rival products?
One of the best trendy challenges is a "chip-off" between countertop appliances. Air fryers have been the must-have kitchen gadget of the season. And yes, we do have one, so I decided we'd compare making our favourite rustic chips in the AeroGrill versus how we usually make them in our air fryer.
The chips were a combination of sweet potato and white potato with a jerk seasoning and a spray of oil. Cooking the rustic chips on the chips pre-set in the AeroGrill means preheating for five minutes. Then, cooking at 170 degrees for 21 minutes. Compared to our air fryer, which heats instantly, the pre-heating felt like a bit of a faff.
However, there was a moment at which I was persuaded that I preferred cooking chips in the AeroGrill, using the crisper basket. It was when I checked them halfway through cooking and saw that the chips were cooking evenly and didn't really need turning. My partner can testify to having to shake chips from our air fryer at least four times when cooking to get an even crispness and so the chips on top don't burn.
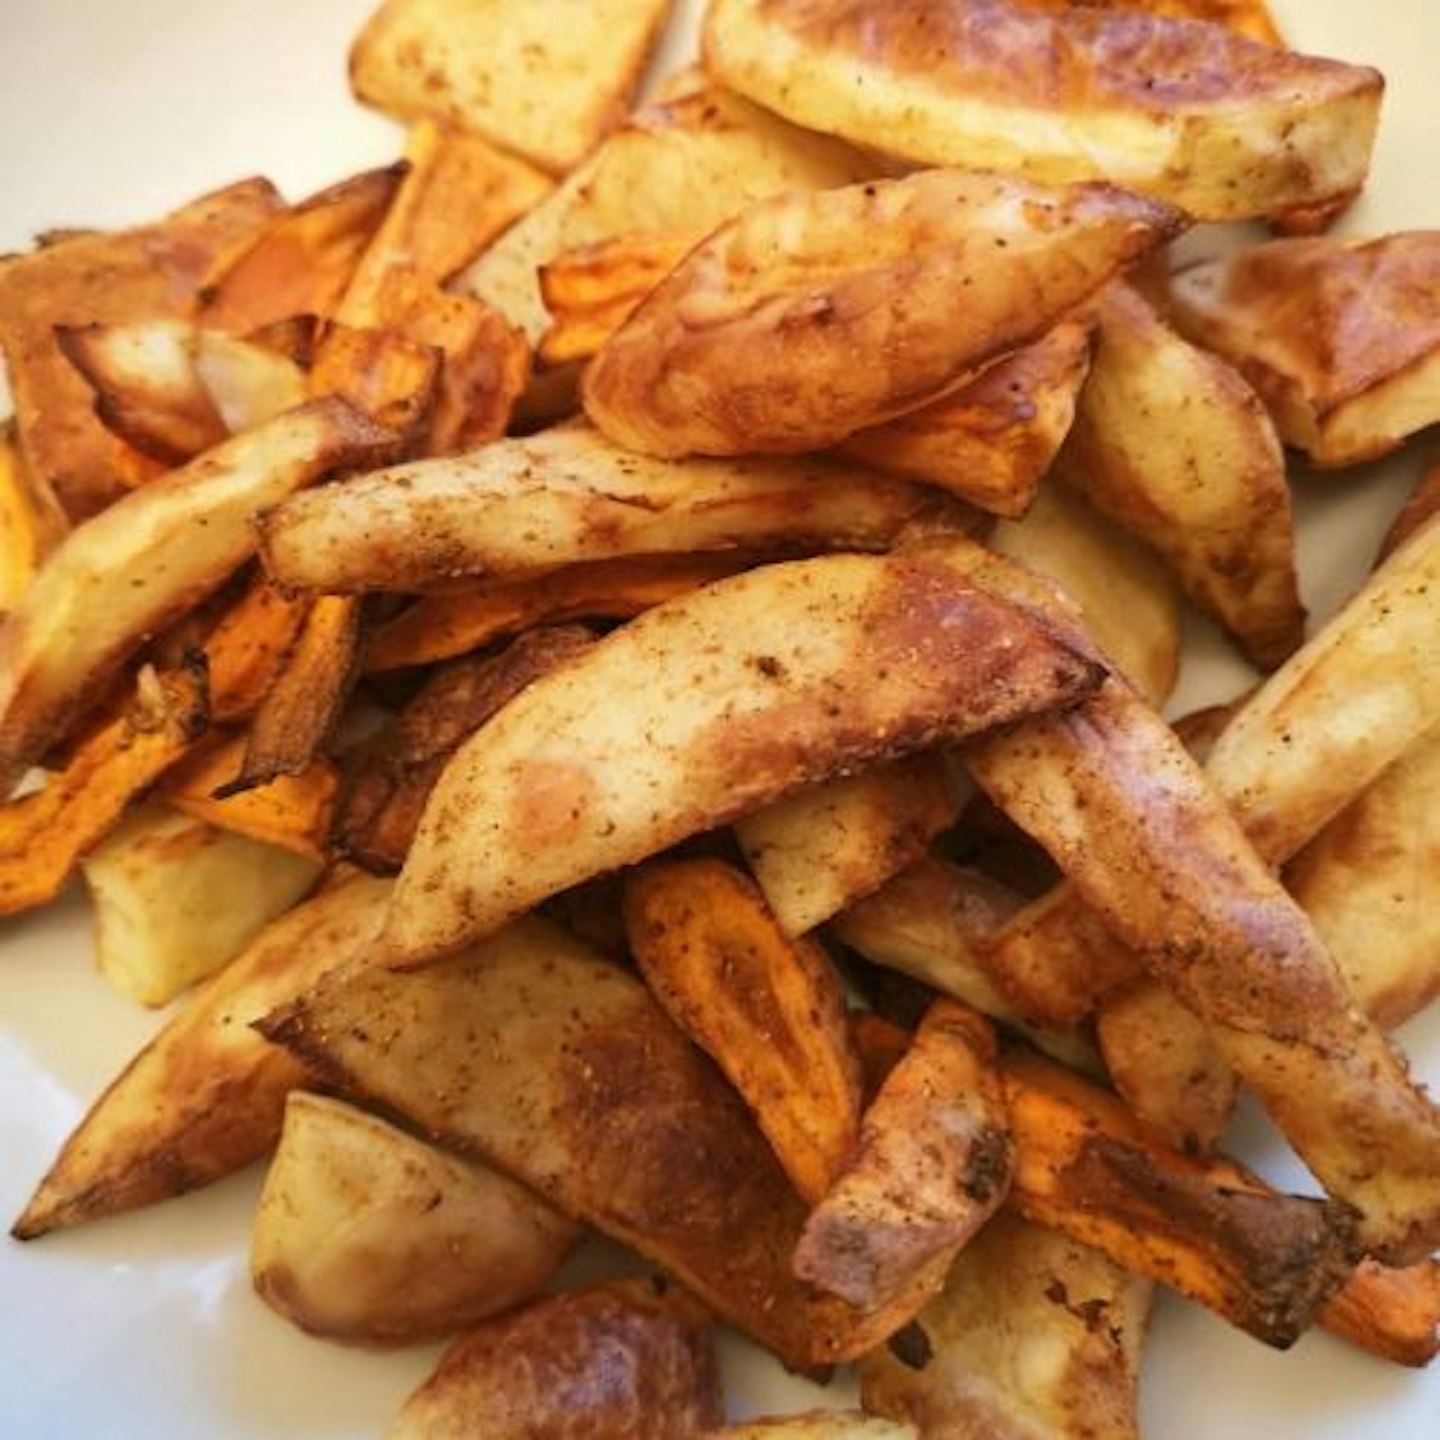
Also, the overall cooking time works out about the same, as our air fryer takes about 25 minutes for well-done chunky chips. We gave the rustic chips the full 21 minutes cooking time in the AeroGrill, they were perfectly cooked through and lovely and fluffy inside. This appealed to me as I hate having to par-boil potatoes when I'm making wedges, so it's even better that the AeroGrill cooked the potatoes through perfectly.
OUR VERDICT: Salter AeroGrill Pro
To sum up reviewing Salter's AeroGrill, it's an appliance that suits the needs of my household. It cooks fast, healthy, cheaply and it's versatile. A case in point is the baked potato test. I live in hope of being able to cook the baked potato of my dreams, but characteristically, I'm always in a rush. I was able to achieve great results on my lunch break, by par-cooking a potato in the microwave and finishing it off in the AeroGrill. My hopes for a crispy skin were fulfilled. I cooked on high (220 degrees) for 15 minutes and used the crisper basket. I was very pleased that the potato browned on all sides. Served with butter, it was a lovely hot lunch on a chilly winter's day. The AeroGrill's ability to cook things evenly on all sides is impressive.
Overall make sure to pay attention to the pre-set designed to cook the specific thing you are grilling. Take care when using the grill tray, because food is positioned closer to the fan. If you're cooking mixed vegetables, it's better to use the cooking pot accessory.

Full Product Specifications
Accessories included: Instruction manual, recipe booklet, grill plate, crisper basket, cooking pot and cleaning brush
Capacity: 3.8 litres
Dimensions: 25.6H x 41.4W x 40.6Dcm (Grill tray dimensions: 33cm width x 22.5cm depth x 5cm height)
Power: 1,700 watts
Weight: 9.44kg
Special features: 16 cooking functions, touch control LED display
Benefits: Use little to no oil for fast, energy-efficient healthy cooking, chargrill flavours, multi-functional, adjustable controls, accessories included
Price: £149.99
FAQs
Can you put a Pyrex dish in an AeroGrill?
Yes, because Pyrex, unlike other glassware, is designed to withstand temperatures up to 300 degrees. It is best to preheat the glassware in the appliance as an extra precaution to reduce the risk of cracking. In addition, you can use silicone cookware in an AeroGrill as it's also designed to withstand temperatures of 230 degrees. Stainless steel baking tins and trays are also fine to use in an AeroGrill. Just be sure to use an oven-safe mitt or cloth when you're taking hot food out of the appliance. If in any doubt, look for cookware that's labelled as air fryer safe.
Can you use the grill with the lid open?
Salter advises not to use this appliance with the lid open. The heating element is contained in the lid; therefore, the appliance needs to be closed in order for it to work.
Natalie Knowles is a Homes & Garden Product Writer for A Modern Kitchen, specialising in kitchen appliances. When she's not testing coffee machines, she flexes her creative flair as an artist.